In this exercise we will create a custom list with 3 custom columns: FirstApprover, LastApprover, and PercentCompleted. Then we will create a workflow that creates items in the Task list for FirstApprover and LastApprover. The workflow will contain a while loop that keeps assigning a new Task item for LastApprover until he sets the custom lists PercentCompleted column to 100%. Let’s begin…
Start by creating a custom list named “myList” in your SP 2010 site. Leave the default “Title” column, and add the following 3 columns:
- FirstApprover (Person or Group)
- LastApprover (Person or Group)
- PercentCompleted (Number, Number of decimal places: 0, Default value: 0, Show as percentage: checked)
- Open SharePoint Designer 2010 (SPD), click “Open Site”, type the URL of the site collection that you just added myList to, click the “Open” button
- Within the Site Objects area, click “Workflows”
- Click the “List Workflow” icon located near the top left of the SPD window, then select “myList” from the drop down menu that appears
- Enter “myWorkflow” in the “Name” textbox, and click the “OK” button
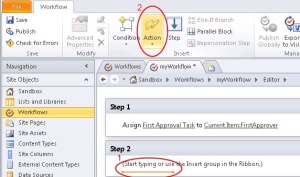
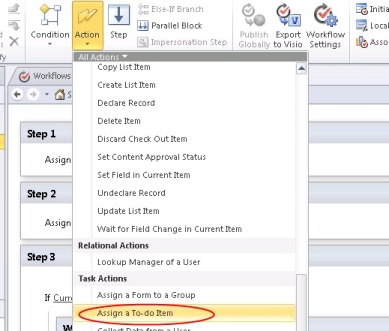
- At this point, SPD creates a “Step 1” by default and places the blinking horizontal orange cursor within that step, then click the “Action” icon, the select “Assign a To-do Item” from the drop down menu as shown below

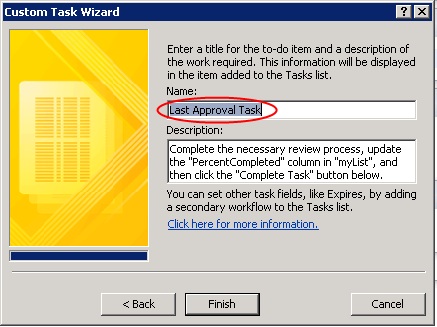
- Click the “a to-do item” link, then click the “Next” button on the popup window.

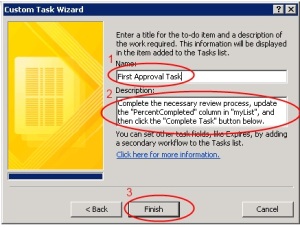
- Enter the name, description, and then click “Finish”
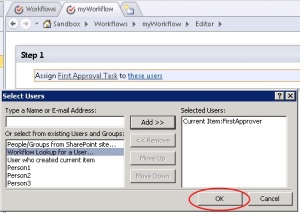
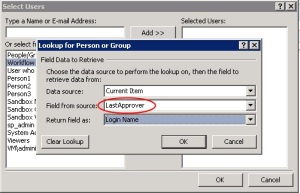
- Click the “these users” link, then select “Workflow Lookup for a User”, then click the “Add >>” button

- Select the data source, field from source, return field as, and then click “OK” as shown below
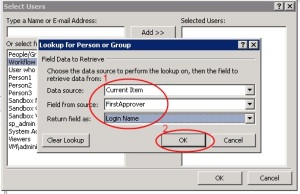
- Click the “OK” button
- Click below Step 1 to position the orange cursor, then click the “Step” icon

- Click within Step 2 to position the orange cursor, then click the “Action” icon, then select “Assign a To-do Item” from the drop down menu as shown below
- Repeat the directions for steps 6 through 10, but enter a different name as shown below

- Repeat the directions from steps 11 through 16, but select a different “Field from source” value as shown below
- Repeat the direction from step 17 and 18 in order to create Step 3
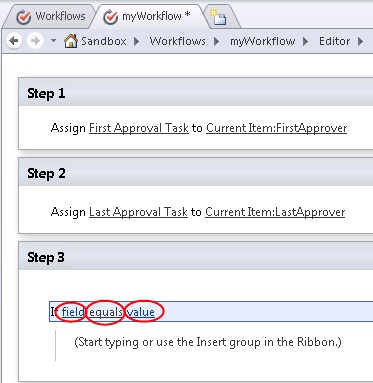
- Click within Step 3 to position the orange cursor, then click the “Condition” icon

- Select “If current item field equals value” from the condition drop down

- Click on the 3 links and…

- …select the values as shown below

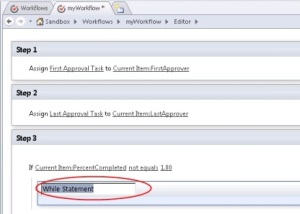
- Click within the area as shown below by “1”, then add a step by clicking the “Step” icon as show below by “2”

- Click on “Step 4” and change the text to “While Statement” as shown below
- Click inside the “While Statement” step to position the oragne cursor, then click the “Action” icon
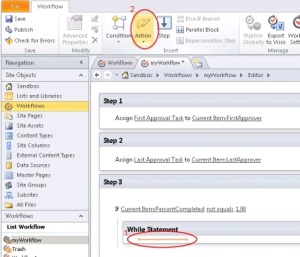
- Select “Assign a To-do Item” from the Action drop down list

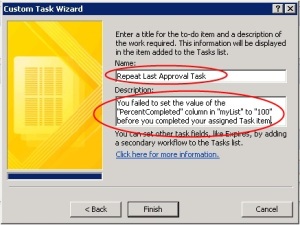
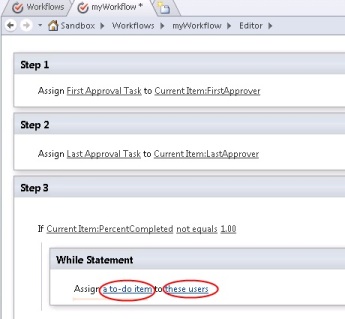
- Repeat steps 21 through 24 to set the values for “a to-do item” and “these users”, but use a different name and description as shown in the second picture below (NOTE THAT “1.00” IS USED INSTEAD OF 100% BECAUSE THAT IS NOW SHAREPOINT HANDLES NUMBER PERCENTAGES)

- Confirm that your workflow design looks the same as pictured below, then right click the “myWorkflow” tab and select “Save”. EDIT: I believe there is a typo in the screen shot below. “LastAction” should be changed to “LastApprover”.

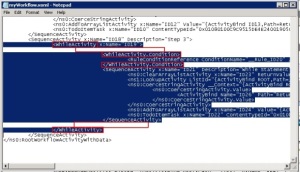
- Click “All Files” in the Site Objects area on the left of the screen, then “Workflows”, then “myWorkflow”, then right click “myWorkflow.xoml”, then “Open With, then “Notepad”

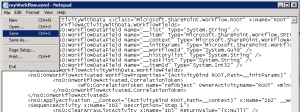
- Scroll down to the end of the file and change the code in the first picture below to look like the code in the second picture below

- Select “File” from the top menu bar, then select “Save” from the drop down menu
- Close the Notepad window and return to SharePoint Designer (you should be back at the “myWorkflow” folder tab)
- Click the “myWorkflow.xoml” link to open the “myWorkflow” tab as shown below.
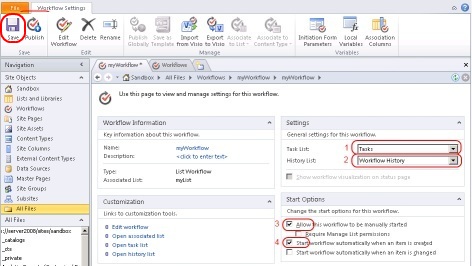
- Ensure that the values are set as shown below, then click the “Save” button in the top left corner of the SPD window, then click the “Save” icon

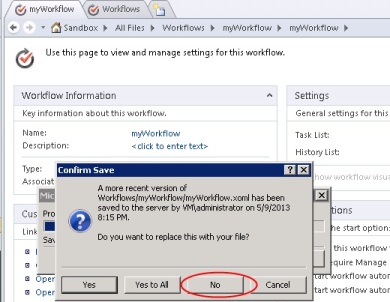
- Due to the manual changes that we made in Notepad, you will be prompted, so click the “No” buttton

- Click the “Publish” icon as shown below


EDIT: Thanks to Vincent Seckel for identifying the following omission. You must modify the web.config file of the target SharePoint application since the while activity is disabled by default. Locate the following line of code in the web.config file and change Authorized=”False” to Authorized=”True”:
<authorizedType Assembly=”System.Workflow.Activities, Version=3.0.0.0, Culture=neutral, PublicKeyToken=31bf3856ad364e35″ Namespace=”System.Workflow.*” TypeName=”WhileActivity” Authorized=”True” />
That’s it! You should now have a workflow with a while loop attached to myList. The workflow should start automatically when a new item is added to myList. Let’s confirm that it is working…
Add a new item to myList. Be sure to set the FirstApprover and LastApprover fields. Also, set the PercentCompleted value to zero.
Browse to your the Task list. You should see a task item assigned to the person that you selected for FirstApprover. Go ahead and edit the task item. Click the “Complete Task” button and the workflow will move to the next workflow step.

Refresh the page to see the new task item that has been assigned to the person you designated as LastApprover. Edit the task item and click the “Complete Task” button.
Refresh the page again and you will see that another task has been assigned to the person that you designated as LastApprover. This is because you did not update the myList item and set PercentCompleted column to 100%.
Go ahead and update the myList item and set PercentCompleted to 100%. Go back to the Task list and edit the task item and click the “Complete Task” button. You should not see any more tasks assigned for this workflow because you met the condition to end the workflow while loop.
If you return to myList, you should see that the “myWorkflow” column is marked as “Completed”.
